


Frank the Rabbit Mask from Donnie Darko - Unpainted DIY
Free shipping to the U.S.
Ships in 1-2 weeks
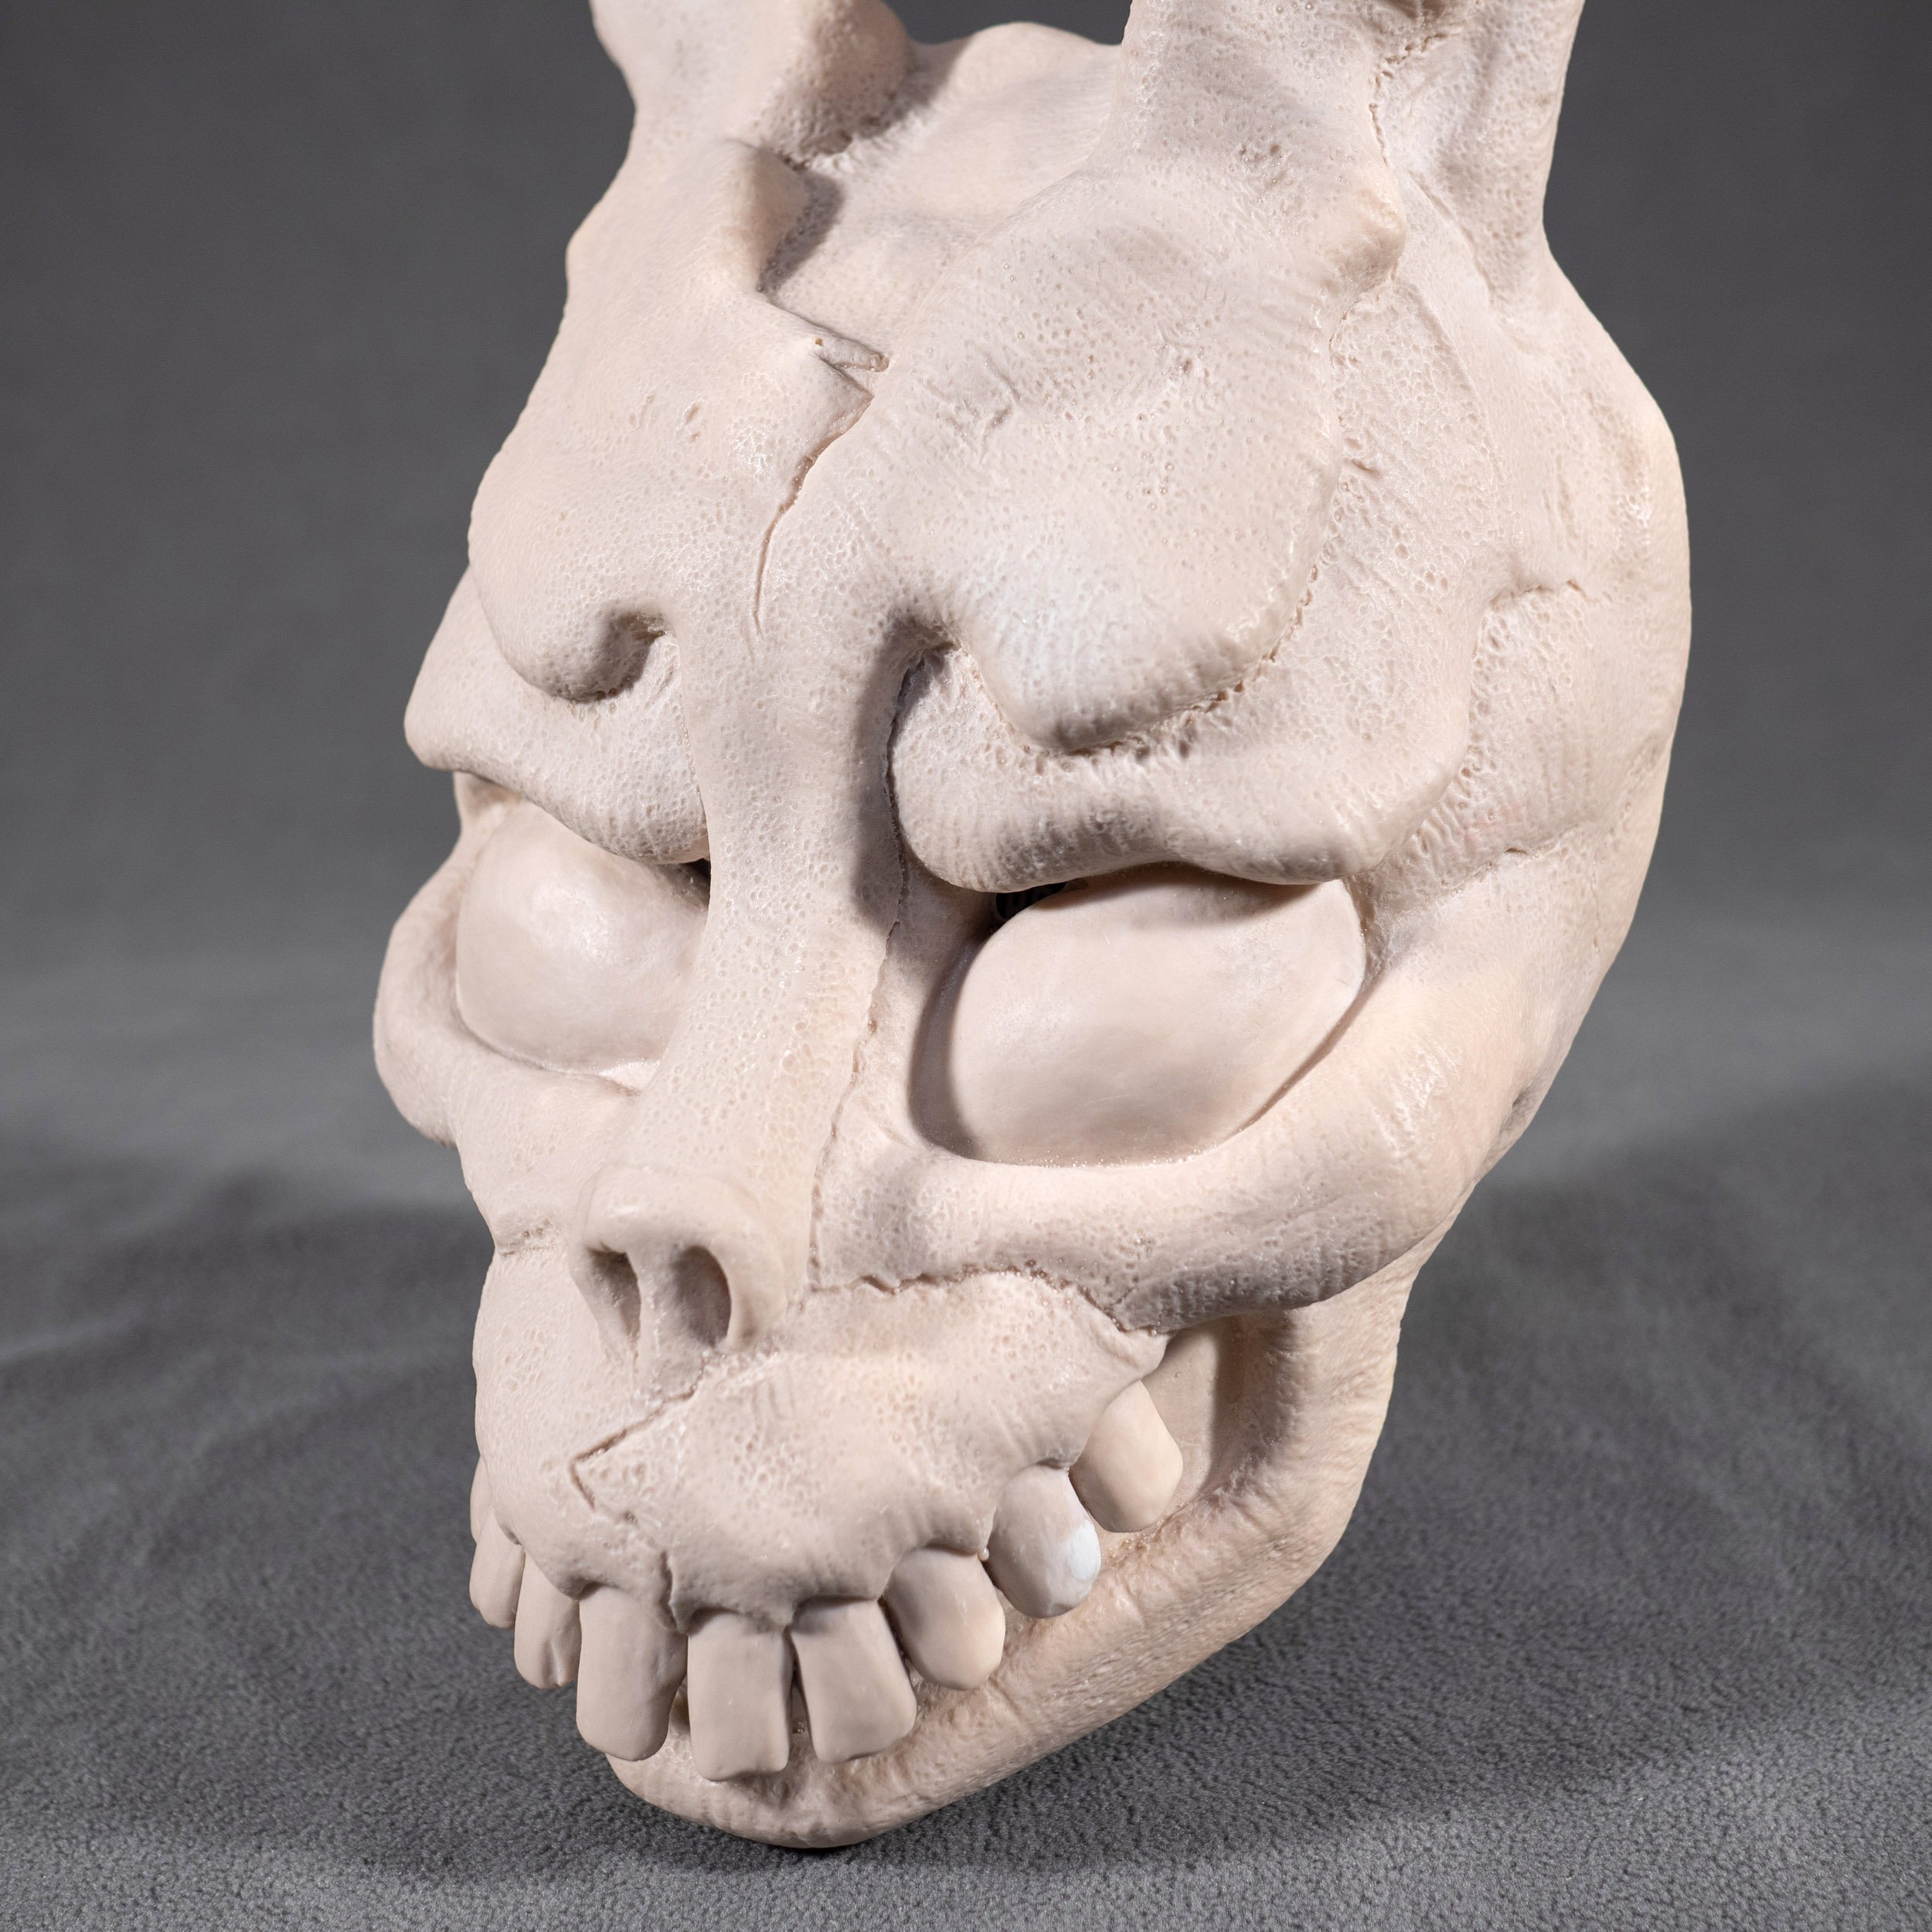
This is a screen-accurate and wearable replica of the Frank mask from the 2001 film Donnie Darko. The mask was sculpted to match reference photographs of masks used during the film production. It is accurate down to the smallest detail, including the sculpting tool marks from the original clay sculpt and the seam line which resulted from the original production mold.
Mask Construction
The mask is constructed to be durable yet lightweight for wearing. The outer shell is composed of a thin layer of rigid urethane resin. The inside of the mask is filled with rigid urethane expanding foam.
Bubbles which occur during the casting process will be filled with epoxy clay. You might see small areas with a light gray color (the color of the epoxy) but these will be indistinguishable after you paint the mask.
You may find small areas where the outer resin shell is thin, possibly even exposing the interior expanding foam. The foam is not as durable as the rigid shell, but painting over these areas is typically enough to seal and protect them. If you wish, you can strengthen/reinforce these areas using a material of your choice (epoxy clay, etc).
Faux Fur Hood
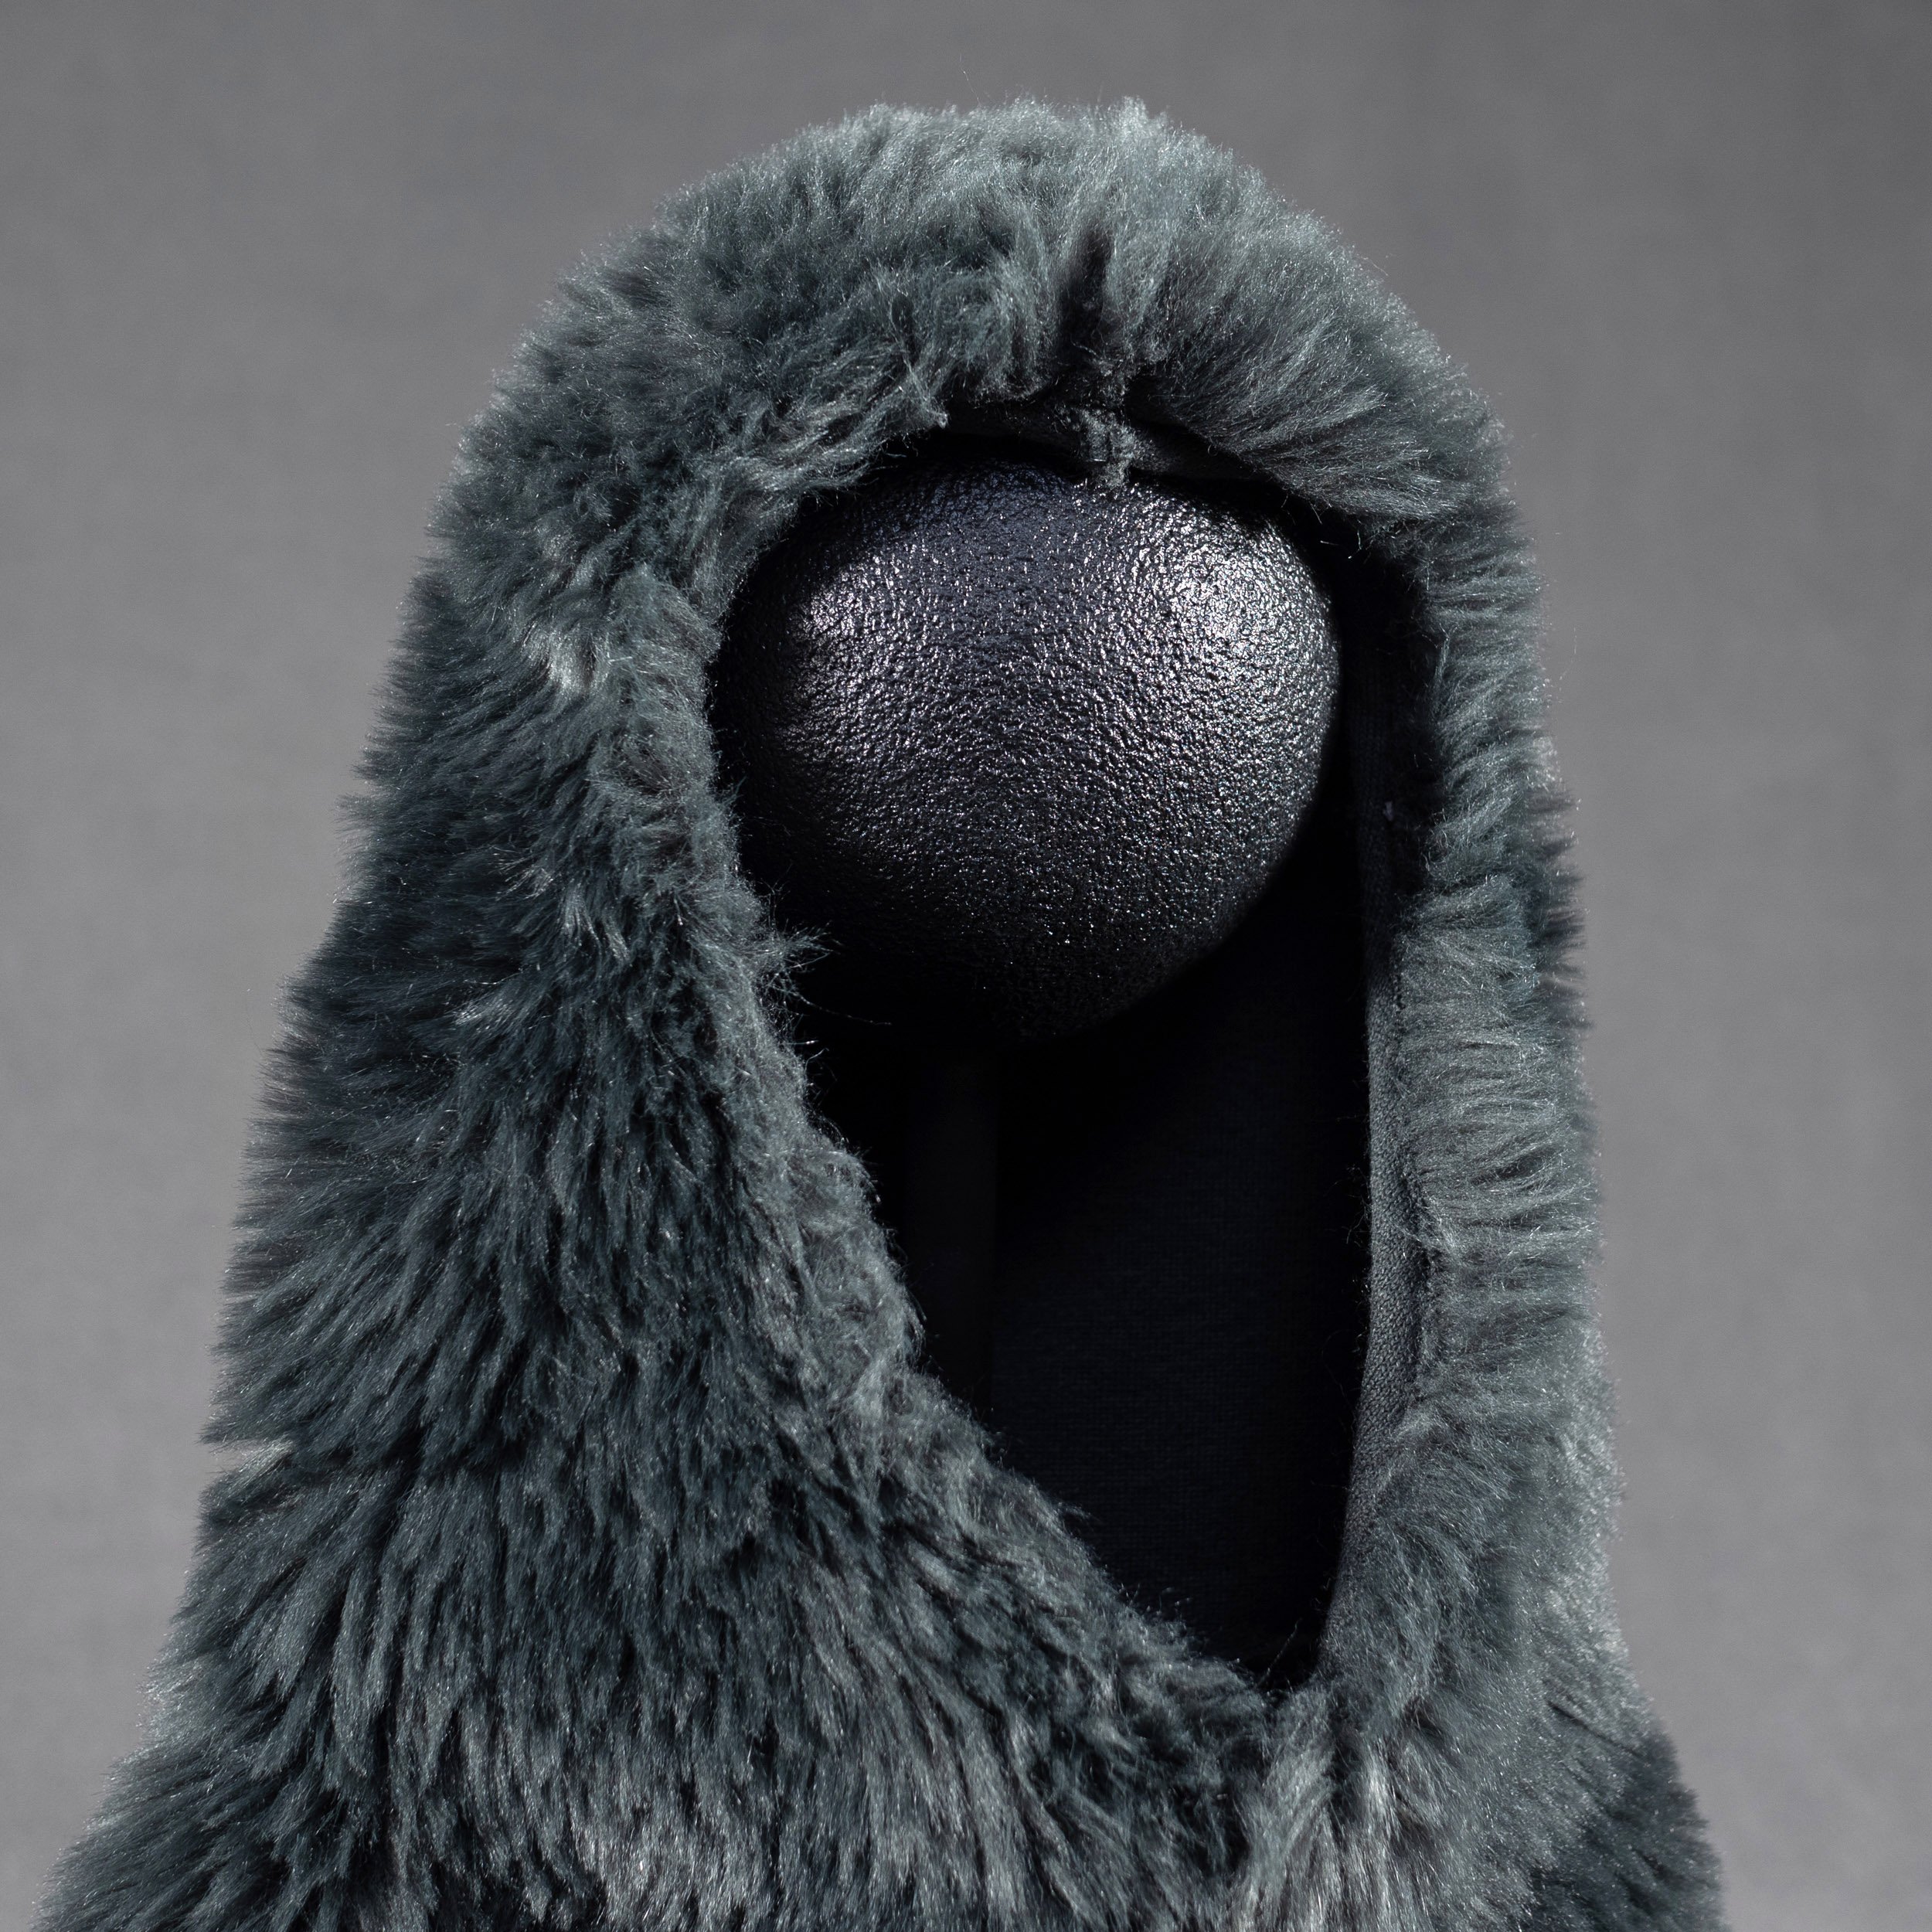
The optional faux fur hood is custom sewn to fit the mask. It has a charcoal (dark gray) color which closely resembles the look of the fur suit used in the film. The hood comes unattached - you will need to attach it to your mask. The inside edge of the hood is folded over and sewn to provide a surface for gluing to the mask (see photos).
There is only one size of hood available, designed to fit most head sizes.
If you would like to create your own fur hood, you can use this pattern.
Display Stand
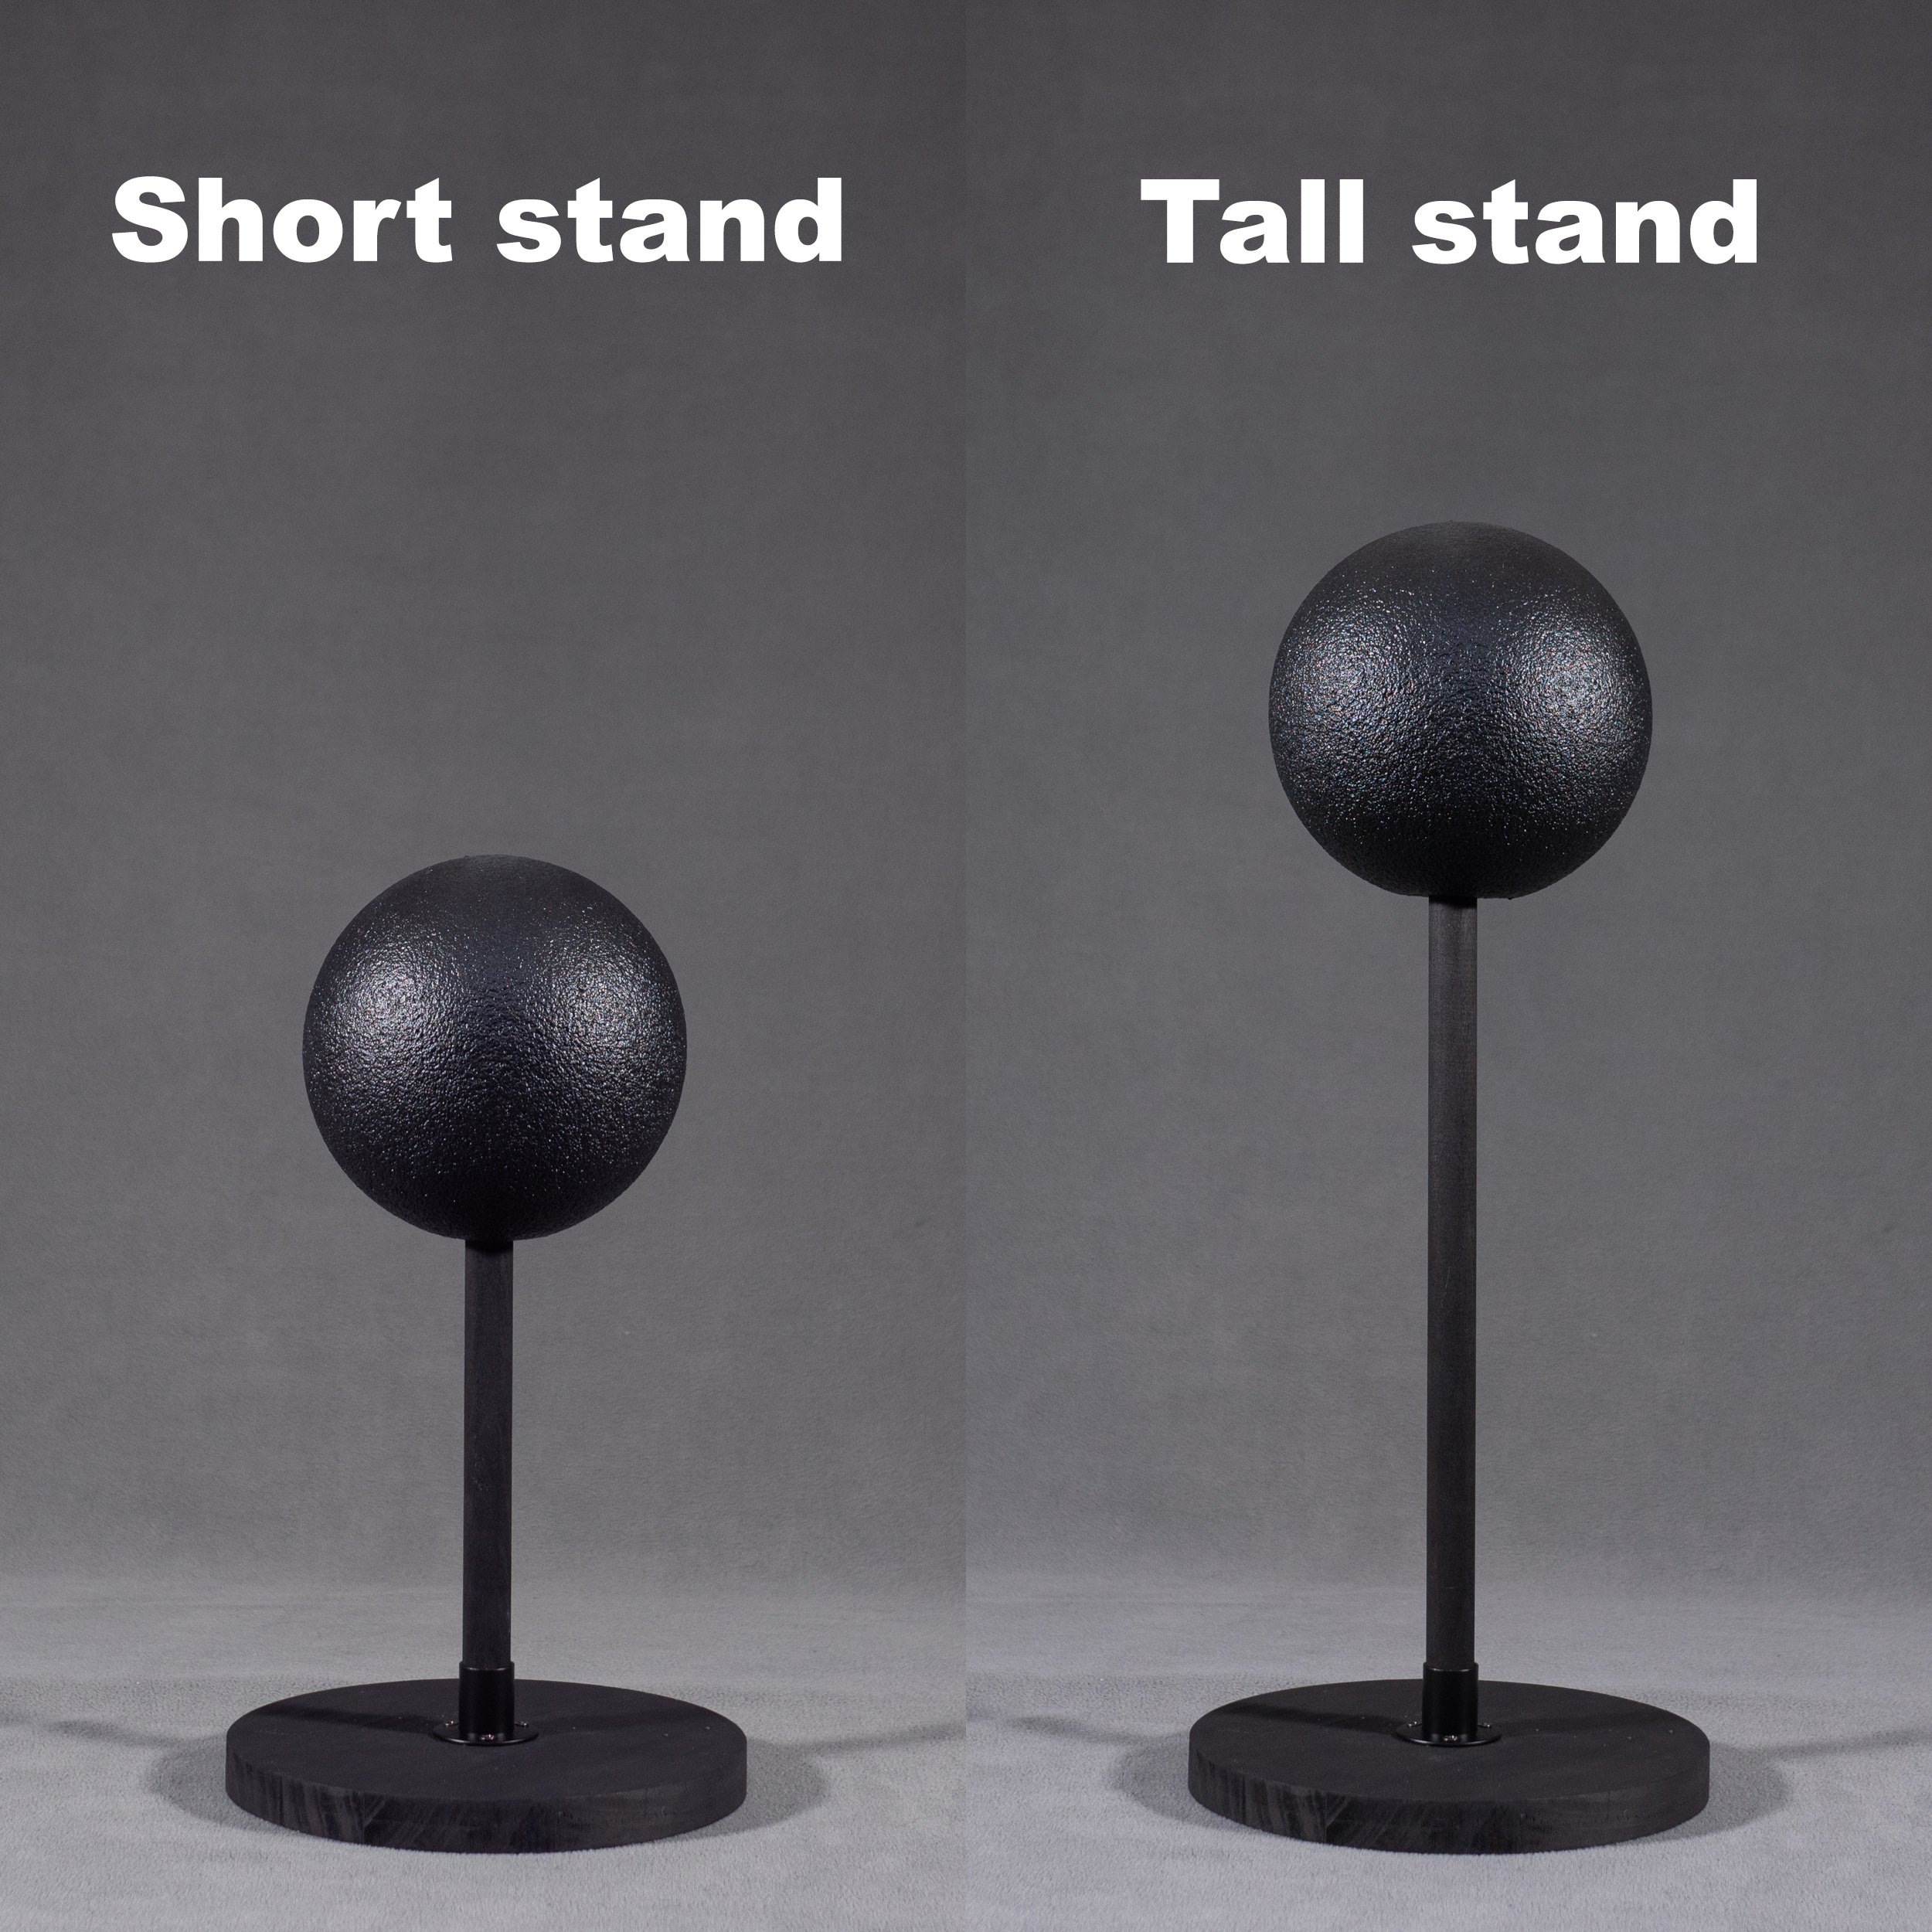
The optional display stand has a wood base/dowel plus a flexible foam ball for supporting the mask.
Short stand — This is recommended if you plan to display the mask without a hood. Short stand height is approximately 15 inches (38 cm).
Tall stand — This is recommended if you plan to display the mask with a hood because it gives room underneath the mask for the hood to drape without bunching up. Tall stand height is approximately 20 inches (51 cm).
Specifications
Weight: approximately 1.5 lbs (680 g)
Mask dimensions: 21 inches (53 cm) tall x 8.5 (22 cm) inches wide x 6 inches (15 cm) deep
Although the mask is fairly durable, it is not indestructible. Avoid holding it or carrying it by the ears because these are the thinnest points of the mask. Also avoid leaving the mask in hot environments such as inside a closed car during the summer.
Use caution and common sense while wearing the mask! The holes above the mask eyes allow you to see out while wearing it, but they obstruct most of your vision. The hole under the mask teeth helps with air flow while wearing the mask, but if you attach a hood to your mask this will trap air AND heat. It is not recommended to wear a mask with hood for extended periods of time.
Tips for finishing your mask
Painting
Just about any type of paint will bond to the urethane resin shell of the mask. Acrylic, lacquer, or enamel paints are recommended. To see photos of screen-used masks for color reference, check out this post on The RPF:
www.therpf.com/forums/threads/frank-the-rabbit-from-donnie-darko-–-mask-history.329474/
Fur
The hoods I make have a turned and sewn edge — this allows you to apply the glue to the fur backing rather than directly to the fur itself. If you’d like to create your own hood, you can use the pattern linked above in the description. Look for fur that has a 1-2 inch pile. High-temp hot glue works well for attaching the hood to the mask. Use some low-grit sandpaper to scuff up the inside edge of the mask before gluing. This will help the glue to bond to the mask.
Straps
If you’re planning to wear the mask, straps will help keep it in place on your head (the fur hood by itself isn’t really enough). Straps can be made with leather, webbing (cotton or synthetic), elastic, string, etc. You can attach them with a strong adhesive like 2-part epoxy. Scuff up the inside surface of the mask with low-grit sandpaper to help the glue to bond. To really make sure my straps stay in place, I like to add a mechanical connection in addition to the glue. For example, if I’m using leather straps, I punch a hole in the end of the leather, drill a shallow hole on the inside edge of the mask, add some 2-part epoxy in and around the hole, place the strap with the holes aligned, then insert a short screw (approximately 1/4 inch long) into the hole. You probably won’t be able to screw it in, just make sure it’s a snug fit and wait for the epoxy to cure before trying it on.
Fully painted version:
